Creating Your Own Family History Website
Genealogy is a collaborative project. Yes, you can sift through family records and websites to gather information. But, in order to compile a comprehensive history of your family, you need to involve your other family members. Who else but the members of your family working together collectively would be best suited to help piece together bits of your family’s history and lore into a fully fleshed out family tree? Your family history project should be accessible to the very people who have a vested interest in your genealogy project: your family.
By creating your own family history website, you will gain two benefits. The first is that you can post updated news about your ongoing genealogy project. The website will also provide an interactive venue where your family can add valuable information to help you with your family history. Having a central location for your family to track your project and offer insights, personal stories, and recollections in addition to helping you find missing information is beyond valuable. Family historians often rely heavily on the Internet to research their family’s history, but they rarely think of using it to their full advantage in this way.
Another benefit to having a family history website is that your family, both immediate and extended, will be able to enjoy your work when you have finished your project. A family history is enjoyed by both the immediate and the extended family and your family website will give all family members access to the family tree. Who knows, it might even inspire many to do their own family tree. You can link other family trees to your blog, creating a network of related family trees. The possibilities are vast, but in the end, it is a fun and creative way to easily share the fruits of your labor.
A lot of people think hosting a website is expensive, but you do not need to actually go into the cost of buying your own website, although you certainly may if you so wish. For many, a blog is simple enough to manage and will suit all of your needs. Blogs are especially easy to set up and maintain for those who do not have extensive website experience, and you can easily set up a blog without needing to learn the ins and outs of html.
BlogSpot, or Blogger, is a highly recommended site. It is part of the Google family, so you will need to set up a Google account if you do not already have one. Blogger will host your blog for free, so it will cost you nothing for a basic blog. Blogger is simple—what you see is what you get—and for the average blogger, it will serve just fine. You will be able to post to your blog from your computer, or via email, so if you are traveling or on the go and want to update, you can do so. Blogger is a no fuss no muss type of blog and that is why I recommend it; it is very easy to set up.
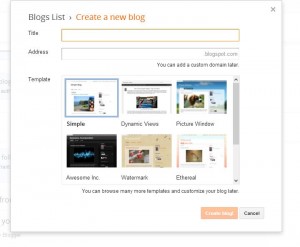
Now, you need to decide on the title and address for your blog. Most people choose to use the title as their blog address to make it easier for other people to find the blog. If you title your blog “Sarah Smith’s Family Blog” but then make the address something like this: “smithfamilyhistoricalblog.blogspot.com,” people who know your blog as “Sarah Smith’s Family Blog” may have trouble finding it. Therefore, the title of your blog should also be the blog address. The exception is if you have a long blog title, in which case you can choose to shorten it for the blog address, but still use the main part of your title for the address. For example, if you call your blog “The Smith Family Genealogy Project” but want a shorter address, you can use “Smithgenealogy.blogspot.com” for a shorter title. As you can see, the blog address still evokes the main theme of your title.
You will also choose a template to use. You can change your template later, but go ahead and pick the template you would like to use and then click the create blog button. You are now the proud owner of your very own blog.
Go to www.blogger.com to get started. You will see a sign in box to the right of your screen; if you already have a Google account, such as for Gmail or Google +, go ahead and sign in to get started. If you do not have a Google account, scroll down the page until you see a box which says “Sign Up.” Please note, you are not required to have a Gmail email to sign up for Google, you just need to have any personal email account. You will not have to create a Gmail account to sign up for Blogger, just a Google account.
Now that you have an account, you can use it to sign into Blogger if you are not automatically signed in. In screenshot 1, the red arrow is pointing to the “New Blog” button; you will need to click on “New Blog” to begin creating your blog. If you have other blogs, they will be listed here. You can have more than one blog if you so choose
Once you click “New Blog,” you will be taken to the screen shown in screenshot 2 below.
To begin posting to your blog, click on “Start Posting” and begin to write your first blog post. It will ask you for a post title. Once you fill in the title of your post, you will begin to compose your blog post in the text box below. You can write in plain text, or you can use HTML code. You can insert links or pictures, including family pictures or a family tree, to the blog post. Include whatever media you feel is relevant to your post.
To the right will be the post settings. You can choose labels and your options from here. If you want an interactive blog, allow reader comments. To publish your post, select “publish” to the right of where you entered your post title. You can save your post with the “save now” option, preview it with the “preview” button or publish it by selecting “publish post.” If you select “publish post,” you will have published your first blog post on your new blog.
That is how you create a blog for your family history project. You can post as much or as little as you prefer. If you want to make your blog look more polished and professional, go to the publishing options under the settings tab and, for $10 a year, you can buy a domain for your blog.
Until next time,
Kim


